To render a wall with sand and cement, first mix the sand and cement. Then, apply the mixture evenly to the wall.
Rendering a wall with sand and cement enhances both its durability and appearance. This process involves preparing the right mix of sand and cement, ensuring a balanced consistency for a smooth application. Start by cleaning the wall surface to remove dust and debris.
A clean surface ensures better adhesion of the render. Next, mix the sand and cement in a suitable ratio, typically 4 parts sand to 1 part cement. Apply the first coat, known as the scratch coat, and allow it to dry. Afterward, apply the second coat for a polished finish. Properly rendered walls not only look aesthetically pleasing but also provide added protection against weather elements.
Introduction To Sand And Cement Rendering
Rendering a wall with sand and cement is a popular method. This technique is used to create a smooth, durable surface. It can enhance the look and lifespan of your walls. Homeowners and builders alike prefer it for its reliability.
The Basics Of Rendering
Rendering involves applying a mixture of sand and cement to a wall. This layer serves as a protective and decorative finish. The process requires specific tools and materials.
| Tools | Materials |
|---|---|
| Trowel | Sand |
| Hawk | Cement |
| Bucket | Water |
| Float | Plasticizer (optional) |
- Trowel: Used for spreading the mixture.
- Hawk: Holds the mixture for easy application.
- Bucket: Used to mix sand, cement, and water.
- Float: Smooths the applied mixture.
Preparation is key. Clean the wall to remove dirt and loose particles. Mix sand and cement in the right proportions. Typically, a 4:1 ratio of sand to cement is ideal.
Benefits Of Sand And Cement
Durability is a primary benefit. Sand and cement render can withstand harsh weather conditions. It protects the underlying wall from moisture and damage.
Aesthetic appeal is another advantage. The render can be finished in various textures and colors. This flexibility allows for creative designs and finishes.
Thermal insulation is also improved with sand and cement render. It helps to maintain a stable indoor temperature.
- Durability: Long-lasting and weather-resistant.
- Aesthetic appeal: Customizable textures and colors.
- Thermal insulation: Better temperature control.
In summary, rendering with sand and cement is a practical choice. It provides protection, beauty, and insulation. Whether for new buildings or renovations, this method is effective and reliable.
Essential Tools And Materials
Rendering a wall with sand and cement can transform the look of your home. To achieve a professional finish, you need the right tools and materials. This section will guide you through the essentials.
Choosing The Right Sand
The type of sand you choose is crucial for a smooth and durable render. Sharp sand is the best choice. It provides a strong bond and a textured finish.
Avoid using fine sand as it can weaken the render. Washed sand is also a good option. It removes impurities and ensures a clean mix.
Selecting Quality Cement
Quality cement is key to a long-lasting render. Portland cement is commonly used for wall rendering. It is strong and sets quickly.
Check the cement packaging for the date of manufacture. Fresh cement ensures better performance. Store cement in a dry place to prevent it from absorbing moisture.
Tools For Mixing And Application
Having the right tools makes the job easier and more efficient. Here is a list of essential tools:
| Tool | Purpose |
|---|---|
| Cement Mixer | For mixing sand and cement uniformly |
| Hawk and Trowel | For applying and smoothing the render |
| Float | For finishing the surface |
| Bucket Trowel | For scooping and transferring the mix |
| Spirit Level | For ensuring the render is level |
| Measuring Tape | For measuring areas accurately |
| Brush | For cleaning tools and surfaces |
- Mix sand and cement in a ratio of 4:1 for a strong render.
- Use clean water for mixing to avoid contamination.
Wear protective gear like gloves and goggles to ensure safety during the process. Prepare the wall surface by cleaning and dampening it before applying the render.
Preparing The Wall For Rendering
Before you start rendering a wall with sand and cement, it is crucial to prepare the wall properly. A well-prepared wall ensures the render adheres better and lasts longer. Follow these steps to get your wall ready for rendering.
Cleaning The Surface
First, thoroughly clean the wall. Remove any dirt, dust, and loose materials. Use a stiff brush to scrub the surface. If there is any mold or mildew, use a mild detergent and water solution to clean it off.
For stubborn stains or grime, you can use a pressure washer. Make sure the wall is completely dry before proceeding to the next step. A clean surface is essential for good adhesion.
Applying A Base Coat
Once the wall is clean, it’s time to apply a base coat. The base coat, also known as a scratch coat, helps the render stick to the wall. Mix sand and cement in a 4:1 ratio.
Apply the mixture to the wall using a trowel. The layer should be about 5mm thick. Use a scratch comb to create horizontal lines in the base coat. These lines help the final render layer adhere better.
Ensuring Adequate Bonding
To ensure adequate bonding, you can use a bonding agent. Apply the bonding agent to the wall before the base coat. This helps the render stick better.
If the wall is very smooth, roughen it up with a wire brush. This creates a better surface for the render to adhere to. Always follow the manufacturer’s instructions for the bonding agent.
A well-prepared wall results in a more durable and attractive render. Take your time with these steps for the best results.
Mixing Sand And Cement
Mixing sand and cement is a critical step in rendering a wall. A proper mix ensures the wall is durable and has a smooth finish. Understanding the right ratios and techniques is essential.
Proper Ratios For Durability
Using the correct sand and cement ratio is key. The typical ratio for wall rendering is 4 parts sand to 1 part cement. This mixture provides strength and flexibility. It prevents cracks and ensures longevity.
Here’s a simple table to guide you:
| Material | Parts |
|---|---|
| Sand | 4 |
| Cement | 1 |
Always measure carefully. Too much cement can make the mix brittle. Too much sand can weaken the mix.
Tips For A Consistent Mix
Creating a consistent mix ensures a smooth application. Follow these tips for best results:
- Use clean, dry sand. Wet sand can alter the mix ratio.
- Mix thoroughly. Ensure all cement and sand particles are combined.
- Add water slowly. The mix should be pasty, not runny.
- Use a wheelbarrow or mixer for large quantities. It saves time and ensures uniformity.
- Test the mix by pressing a small amount. It should hold its shape without crumbling.
Follow these guidelines for a durable and smooth render. A good mix ensures your wall will last for years.
Application Techniques For Rendering
Rendering a wall with sand and cement can transform its appearance. It provides a durable finish that protects the wall. The following application techniques ensure a professional result.
Layering Methods
Layering is essential in rendering. It involves applying multiple coats of sand and cement. Each layer serves a specific purpose.
The first coat is called the scratch coat. It provides a strong base for the next layers. Mix one part cement with four parts sand. Apply a 10mm thick layer. Use a notched trowel to create horizontal lines.
The second coat is the float coat. It smooths out the surface. Mix one part cement with five parts sand. Apply another 10mm layer. Use a straight edge to level the surface.
The final coat is the finishing coat. It gives a smooth and polished look. Mix one part cement with six parts sand. Apply a thin layer, about 5mm thick. Use a steel trowel for a smooth finish.
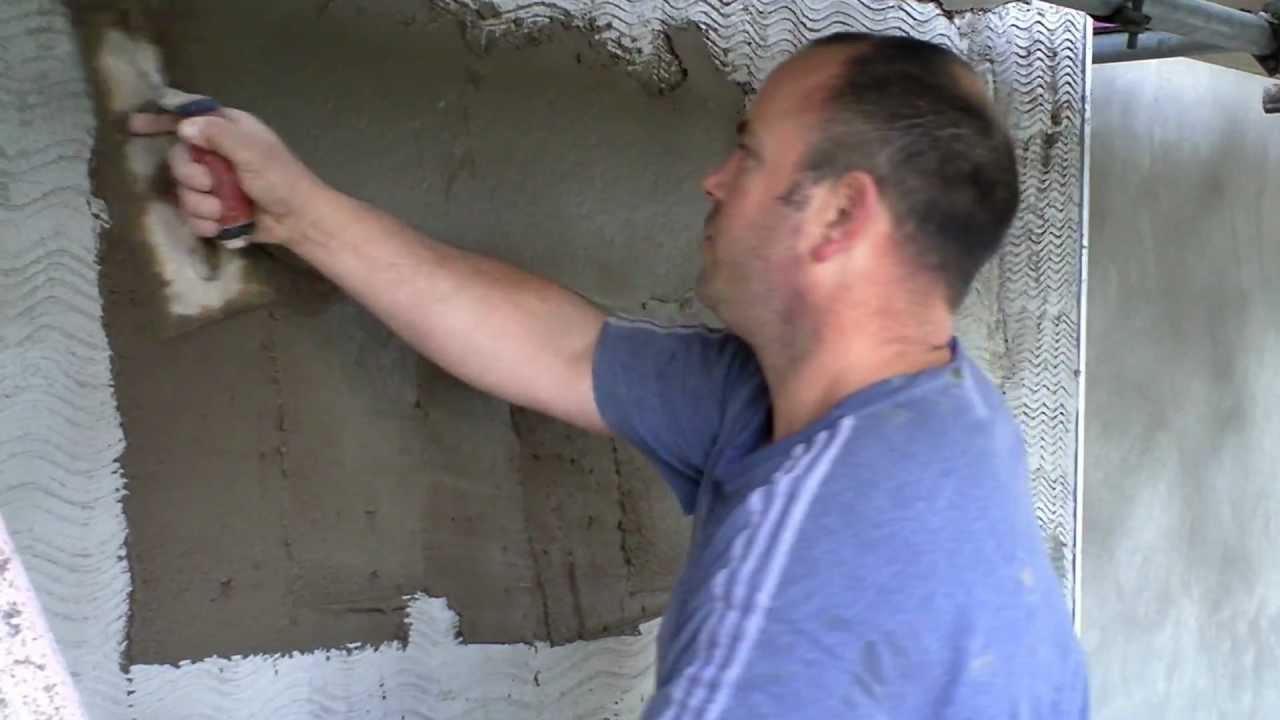
Achieving Smooth Surfaces
Achieving smooth surfaces requires patience and skill. Follow these tips to get a flawless finish.
- Keep the wall damp. This helps the cement adhere better.
- Use a hawk and trowel. These tools help spread the mix evenly.
- Apply thin layers. Thick layers can crack as they dry.
- Allow each coat to dry before applying the next. This prevents cracks and ensures durability.
- Use circular motions with a sponge float. This helps achieve a smooth surface.
After the final coat, use a steel trowel. Polish the surface to make it smooth and even. This step is crucial for a professional finish.
Expert Tips For A Professional Finish
Achieving a professional finish when rendering a wall with sand and cement requires precision. With expert tips, you can create a smooth, durable surface. This section provides essential advice for perfecting your render.
Corner And Edge Treatment
Proper corner and edge treatment is crucial for a professional look. Use corner beads to reinforce corners. These beads help maintain straight lines and prevent cracking. Apply the corner beads before you start rendering.
For edges, use a straightedge tool to ensure clean lines. Apply render carefully around the edges. Smooth the render with a trowel, making sure it adheres well. This step ensures a seamless transition between surfaces.
| Tool | Purpose |
|---|---|
| Corner Bead | Reinforces corners |
| Straightedge Tool | Ensures clean lines |
| Trowel | Smooths render |
Surface Texturing Methods
Adding texture to your render can enhance its appearance. There are several methods to achieve this. Below are popular techniques:
- Sponge Float Finish: Use a damp sponge float to create a smooth, textured surface.
- Brush Finish: Use a brush to create a rough, decorative texture.
- Tyrolean Finish: Use a Tyrolean gun to apply a rough, stippled texture.
Each method adds a unique look to your wall. Experiment with different techniques to find the best finish for your project.
Curing And Drying Process
Rendering a wall with sand and cement is a common method for achieving a smooth, durable finish. The curing and drying process is crucial for ensuring the render’s longevity and strength. Proper curing helps prevent cracks and other damages, ensuring the wall remains robust over time.
Optimal Conditions For Curing
For the curing process, ensure that the wall is kept moist. This is important during the initial stages. The ideal temperature range for curing is between 10°C and 30°C. Avoid direct sunlight on the wall, which can cause rapid drying. Cover the wall with damp burlap or plastic sheets to retain moisture.
| Condition | Action |
|---|---|
| High Temperature | Cover with damp burlap |
| Low Temperature | Ensure proper insulation |
| Direct Sunlight | Use plastic sheets |
Avoiding Cracking And Damage
Cracking is a common issue during the drying process. To prevent this, ensure the render is applied in thin coats. Each coat should not exceed 10mm in thickness. Allow each layer to dry partially before applying the next.
- Keep the wall moist during the curing period.
- Apply thin coats of render.
- Use fibers in the mix to enhance flexibility.
Proper drying takes about 5 to 7 days. During this time, monitor the wall for any signs of cracking. Address any issues immediately to prevent further damage.

Credit: www.facebook.com
Maintenance And Upkeep
Proper maintenance and upkeep are crucial for preserving the look and durability of your rendered wall. Regular care ensures the wall remains in excellent condition, protecting it from damage and wear.
Routine Cleaning
Regular cleaning is essential for maintaining your rendered wall. Use a soft brush to remove dust and dirt. Avoid using harsh chemicals; they can damage the cement finish. A mild detergent mixed with water can be used for tougher stains.
If you encounter mold or mildew, use a mixture of water and vinegar. This solution is effective and gentle on the wall. Rinse thoroughly with clean water to avoid any residue build-up.
Addressing Wear And Tear
Over time, you may notice small cracks or chips on the wall. Early detection and repair are vital to prevent further damage. Use a filler specifically designed for cement to patch up small cracks. Ensure the area is clean and dry before applying the filler.
For larger damages, you might need to reapply a layer of sand and cement render. Ensure you match the texture and color of the existing wall for a seamless repair.
| Issue | Solution |
|---|---|
| Small Cracks | Use cement filler |
| Large Cracks | Reapply render |
| Mold/Mildew | Water and vinegar solution |
By following these maintenance and upkeep tips, you can keep your rendered wall looking pristine and robust for years.
Troubleshooting Common Rendering Issues
Rendering a wall with sand and cement can sometimes cause issues. These problems can affect the look and durability of your wall. This section will help you fix common rendering problems.
Fixing Cracks And Blisters
Cracks and blisters can ruin the appearance of your rendered wall. They often occur due to improper mixing or application.
- Small Cracks: Use a filler to repair small cracks. Ensure the surface is clean and dry.
- Large Cracks: Open the crack with a chisel and fill it with fresh render.
Blisters are usually caused by moisture trapped behind the render. To fix blisters:
- Remove the blistered area using a scraper.
- Clean the surface thoroughly.
- Apply a new layer of render.
Dealing With Efflorescence
Efflorescence appears as a white, powdery substance on your rendered wall. It is caused by salt deposits from water evaporation.
| Step | Action |
|---|---|
| 1 | Brush off the efflorescence with a stiff brush. |
| 2 | Rinse the wall with clean water. |
| 3 | Apply a vinegar solution if needed to remove stubborn deposits. |
To prevent future efflorescence, ensure proper drainage around the wall. Use a water-resistant sealer after the wall is dry.

Credit: www.youtube.com
Advanced Rendering Techniques
Rendering a wall with sand and cement can be a simple job. But advanced techniques can make it stand out. These methods offer more than just a smooth finish. They add beauty and uniqueness to your walls.
Incorporating Colors And Pigments
Adding colors and pigments to your render can transform a plain wall. You can mix pigments directly into the cement. This ensures an even color throughout. Choose pigments that are UV-resistant to keep colors bright over time.
Here are steps to incorporate colors:
- Measure pigments according to the manufacturer’s instructions.
- Mix pigments into dry sand and cement before adding water.
- Blend thoroughly to ensure even color distribution.
- Apply render to the wall as usual.
Creating Decorative Effects
Decorative effects can add texture and depth to your walls. Techniques like trowel textures, sponge finishes, and stamped designs can create unique looks.
Common decorative effects include:
- Trowel Textures: Use a trowel to create patterns. Swirls, waves, and cross-hatches are popular choices.
- Sponge Finishes: Use a damp sponge to dab the surface. This creates a soft, mottled look.
- Stamped Designs: Use stamps to press patterns into the wet render. Brick, stone, and tile designs are common.
Consider these tips for the best results:
- Practice your technique on a small area first.
- Keep tools clean to avoid unwanted marks.
- Work quickly before the render starts to set.
Conclusion: Enhancing Home Aesthetics
Rendering a wall with sand and cement can greatly improve your home’s look. This simple technique transforms dull walls into attractive surfaces. Let’s dive into how this enhances your home’s aesthetics.
Final Thoughts
A well-rendered wall adds a fresh and clean appearance to your home. The smooth finish and even texture create a modern look. It also protects your walls from weather damage, adding longevity.
Color customization is another benefit. You can paint the rendered wall in any color, matching your home’s decor. This flexibility makes it easy to update your style. Improved insulation is an added bonus. A properly rendered wall helps regulate indoor temperature, making your home more comfortable.
Continued Learning Resources
For those eager to learn more, there are many resources available. Books, online courses, and YouTube tutorials offer step-by-step guidance. Below is a table with some recommended resources:
| Resource | Description | Link |
|---|---|---|
| Rendering Walls for Beginners | An introductory book on wall rendering | Visit Site |
| Online Course: Wall Rendering | Interactive lessons on rendering techniques | Visit Site |
| YouTube Channel: DIY Home Projects | Video tutorials on various home projects | Visit Site |
Join online forums to connect with other DIY enthusiasts. These communities share tips, tricks, and experiences. Practice makes perfect. Start with small projects to build your skills. You’ll gain confidence and improve over time.
Rendering walls with sand and cement is a valuable skill. It enhances your home and gives you a sense of achievement.
Credit: m.youtube.com
Frequently Asked Questions
Can You Render With Just Sand And Cement?
Yes, you can render with just sand and cement. This mix is common for external walls. Ensure proper ratios for durability.
What Is The Best Mix For Rendering A Wall?
The best mix for rendering a wall is 1 part cement, 4-5 parts sand, and water. Add lime for flexibility.
How Much Sand And Cement To Render A Wall?
To render a wall, use a 4:1 ratio of sand to cement. For every 4 parts sand, mix 1 part cement.
Why Is My Sand And Cement Render Not Sticking?
Your sand and cement render isn’t sticking due to improper surface preparation, incorrect mix ratio, or application on a wet or dirty surface. Ensure the wall is clean, dry, and properly primed. Mix the render correctly and apply it in thin, even layers for better adhesion.
Conclusion
Mastering wall rendering with sand and cement enhances your home’s durability and appearance. This process is straightforward with the right tools. Remember, preparation is key for a smooth finish. Follow these tips to achieve professional results. Enjoy the satisfaction of a job well done.
Happy rendering!